Printing ID Cards With Photos
This feature is available only for specific models.
This section explains how to create the ID cards using your favorite images.
-
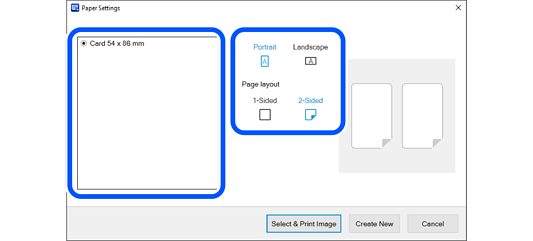
Select the printer, and then click ID Card.

-
Select the orientation and the page layout.
-
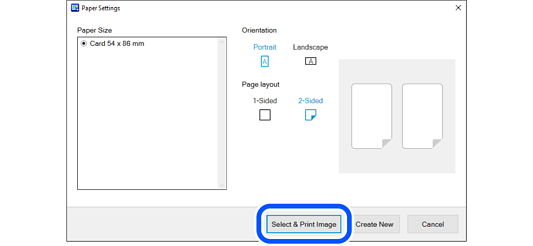
Select Select & Print Image.
-
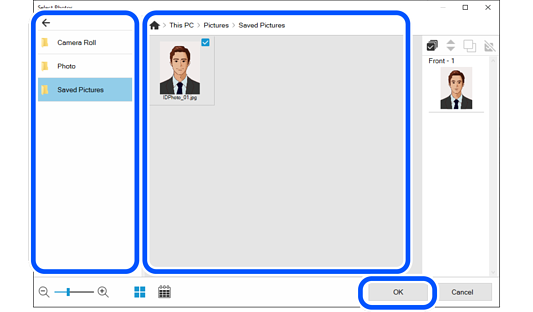
Select photos, and then click OK.
If you selected 2-Sided in step 2, select the photos you want to use for the front and back.
You can check the selected photos in the photo list on the right.
 Note:
Note:-
Click
 to rearrange the photos displayed in order of the shooting date.
To return to the list view, click
 .
.
-
Framed photos are arranged in the order of the photo list. Use the following buttons to edit the contents of the photo list.
 : Select all the photos in the photo list.
 : Change the order of the photos selected in the photo list.
 : Copy the photos selected in the photo list. You can place the same photo in multiple frames.
 : Deselect the photos selected in the photo list.
-
Click OK to reset the editing page to match the selected photo. If you reselect a photo after it has been edited, the page may be deleted.
-
-
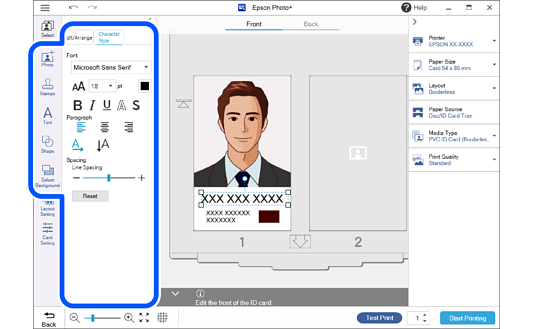
Click the photo to adjust its position, size, and so on.
You can adjust the position by dragging the image.
Select the image and then select the Edit/Arrange tab to enlarge, reduce, rotate, and so on.
 Note:
Note:-
If you only want to print one ID card, click Layout Setting and change the Set position to 1 only or 2 only.
-
 or
or  indicates the direction in which the ID card must be inserted into the printer.
-
-
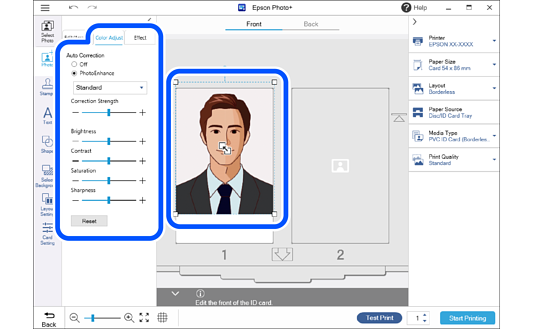
Click the image to adjust its brightness and so on.
Select the image and then select the Color Adjust tab to adjust the brightness, contrast, and so on.
Select the image and then select the Effect tab to adjust the transparency and blurriness.
See the following for more details.
-
Add stamps, text, and so on.
See the following for more details.
-
When you select 2-Sided as the page layout, edit the back side of the card.
Select Back at the top of the edit screen, and then adjust images, add text, and so on.
-
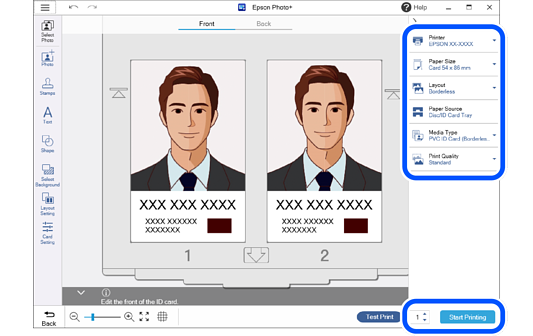
Make print settings, and then click Start Printing.
 Note:
Note:-
Click
 or
or  at the top of the settings area to hide the setting area.
-
When you select 2-Sided as the page layout, follow the on-screen instructions to print the front and the back in order.
-
See the "User's Guide" supplied with the printer for details on loading paper and making print settings.
-