Overview
This section describes the basic work flow for Epson Photo+.
-
Selecting a menu
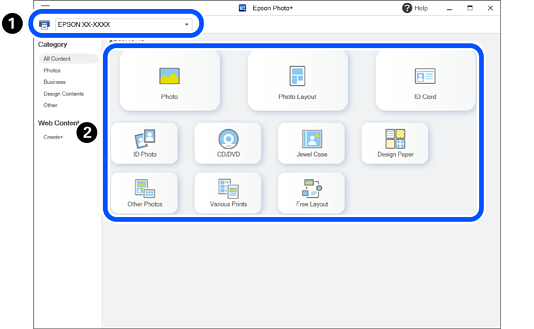
 : Select the printer.
 : Select the menu.
Here, you can select the Photo Layout.
Note:-
You can also select the menu from Category.
See the following for more details about the menus.
-
To select and print content provided by Epson on the Internet, select Web Content.
-
-
Selecting a Frame
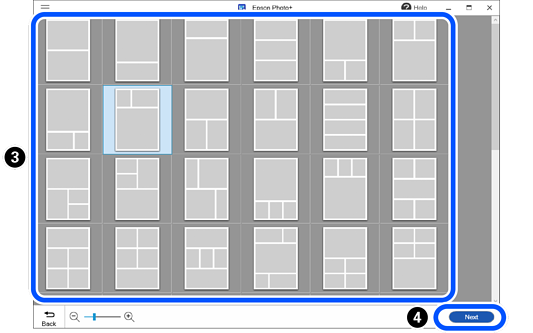
 : Select a frame.
 : Go to the next screen.
Note:
: Go to the next screen.
Note:Frames with an
 icon have not yet been downloaded from the Web site. Connect to the Internet to use these.
-
Selecting the paper size and paper orientation
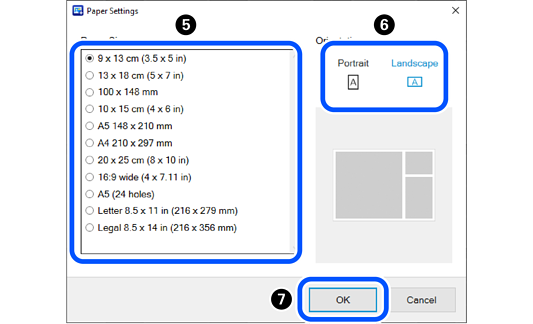
 : Select the paper size.
 : Select the paper orientation.
 : Go to the next screen.
-
Selecting Photos
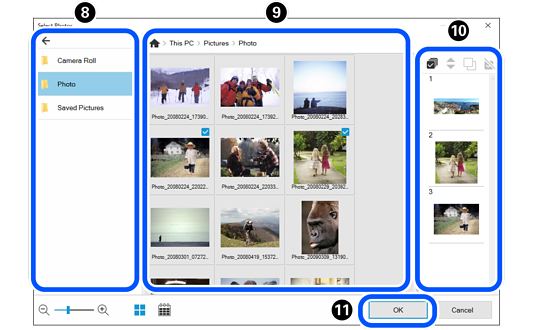
 : Select the folder where you saved the photos.
 : Select photos.
 : Check the selected photos.
 : Go to the next screen.
Note:
: Go to the next screen.
Note:-
Click
 to rearrange the photos displayed in in order of the shooting date.
To return to the list view, click
 .
.
-
Framed photos are arranged in the order of the photo list (
). Use the following buttons to edit the contents of the photo list.
 : Select all the photos in the photo list.
 : Change the order of the photos selected using .
 : Copy the photos selected using . You can place the same photo in multiple frames.
 : Deselect the photos selected using .
-
Click
to reset the editing page to match the photo selected using . If you reselect a photo after it has been edited, the page may be deleted.
-
-
Editing and Printing Photos

 : Add stamps and text. You can also adjust the position and size of photos and added items.
 : Make print settings.
 : Check the number of copies, and then start printing.
Note:
: Check the number of copies, and then start printing.
Note:-
Click
 to add pages.
Click
 to copy the page displayed on the editing screen. However, you cannot copy photos selected on the Select Photos screen.
Click
 to delete the page displayed on the editing screen. Any photos selected in step 4 and added to the deleted page are deselected.
-
See the "User's Guide" supplied with the printer for details on loading paper and making print settings.
-