Overview
-
Selecting a menu
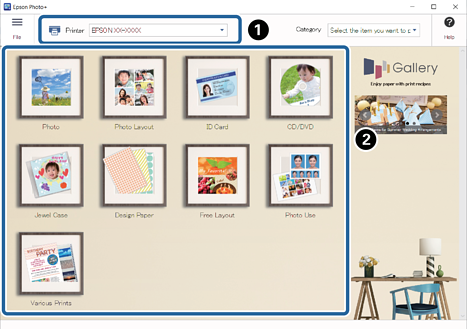
 : Select the printer.
 : Select the menu.
Here, we have selected Photo Layout as an example.
Note:-
Select a keyword from the Category list to display templates that match the keyword. You can easily create leaflets, fliers, or newsletters for schools and communities and so on.
-
See the following for more details on the menu and frames.
-
-
Selecting a Frame
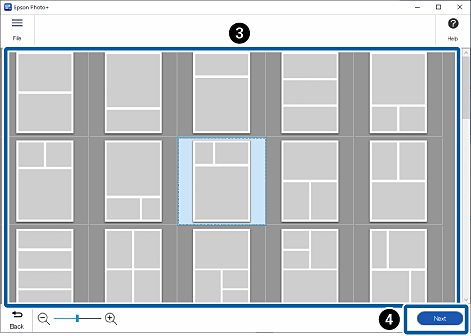
 : Select a frame.
 : Go to the next setting.
Note:
: Go to the next setting.
Note:Frames with an
 icon have not yet been downloaded from the Web site. Connect to the Internet to use these.
-
Selecting the paper size and paper orientation
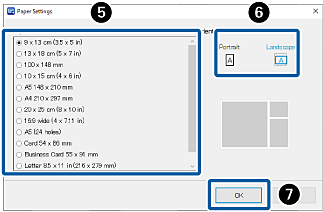
 : Select the paper size.
 : Select the paper orientation.
 : Close the Paper Settings screen.
-
Selecting Photos
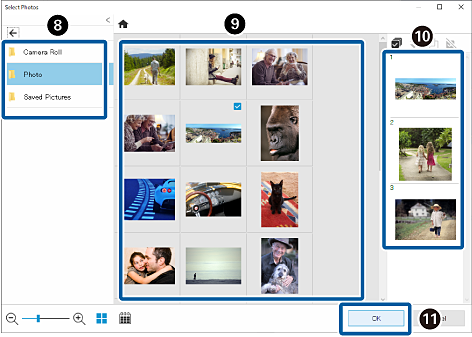
 : Select the folder where you saved the photos.
 : Select photos.
 : Check the selected photos.
 : Close the Select Photos screen.
Note:
: Close the Select Photos screen.
Note:-
Click
 to rearrange the photos displayed in
  in order of the shooting date.
-
Framed photos are arranged in the order of the photo list (
 ). You can change the order of the photos by clicking a photo and then clicking
  . Click
  to deselect a photo.
-
Click
 to reset the editing page to match the photo selected in
  . If it has already been edited, the page may be deleted.
-
-
Editing and Printing Photos
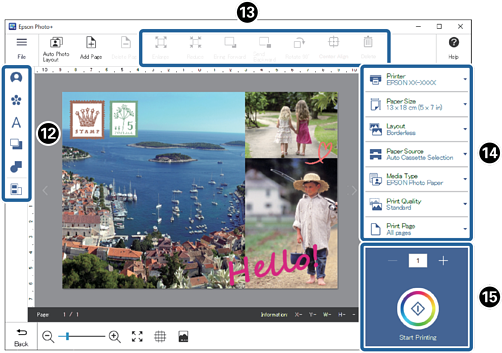
 : Add stamps, text, and so on.
 : Edit photos, stamps, images, and text.
 : Make print settings.
 : Check the number of copies, and then start printing.
Note:
: Check the number of copies, and then start printing.
Note:-
Click Add Page to add pages.
-
See the "User's Guide" supplied with the printer for details on loading paper and making print settings.
-