What is Epson Photo+?
Overview
Printing Photos
Laying Out and Printing Photos and Text
Printing a Photo Index
Printing Disc Labels
Printing ID Cards
Printing ID Cards From the Blank Pages
Printing ID Cards With Photos
Printing ID Photos
Printing by Drag & Drop
Printing a Computer Screen
Arranging Photos
Rearranging Photos
Changing Photos in the Frame
Rotating Photos and Items
Adding an Image to the Frame
Adding Stamps
Adding a QR Code
Entering Text
Setting a Background
Adding Shapes
Changing the Paper Orientation
Adding Margins to Photos
Editing Photos
Changing the Format of the Date Photos were Shot
Troubleshooting
Print Results are Unusual
Cannot Import Photos
Photos are Slow to Display (Load)
The Shooting Date and Time are Wrong
The Paper Size I Want to Use is Not Displayed
Cannot Change the Paper Orientation
Template Update Screen is Not Displayed
Appendix
Menu List
Settings
Trademarks
1Select the printer, and then click Photo.
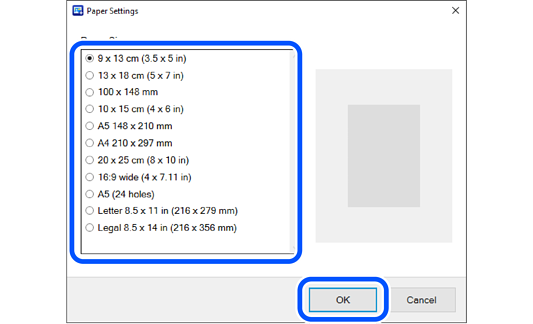
2Select the paper size, and then click OK.
The paper orientation is set automatically according to the selected photo. If you want to change the orientation of the photo, make settings again after selecting the photo. See the following for more details.
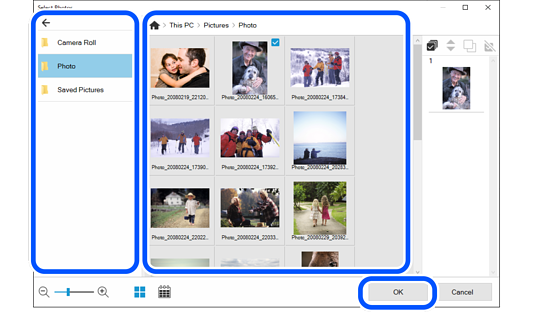
3Select photos, and then click OK.
You can check the selected photos in the photo list on the right.
Click to rearrange the photos displayed in order of the shooting date.
To return to the list view, click .
Use the following buttons to edit the contents of the photo list.
: Select all the photos in the photo list.
: Change the order of the photos selected in the photo list.
: Copy the photos selected in the photo list. You can place the same photo in multiple frames.
: Deselect the photos selected in the photo list.
Click OK to reset the editing page to match the selected photo. If you reselect a photo after it has been edited, the page may be deleted.
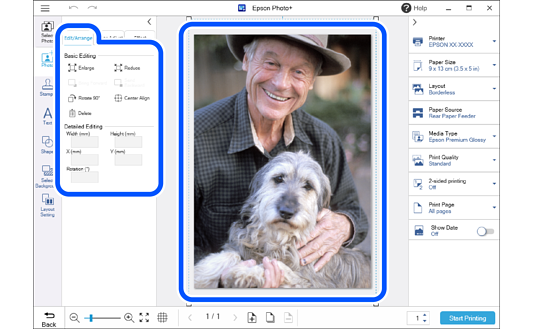
4Click the photo to adjust its position, size, and so on.
You can adjust the position by dragging the photo.
Select a photo and then click the Edit/Arrange tab to enlarge, reduce, rotate, and so on.
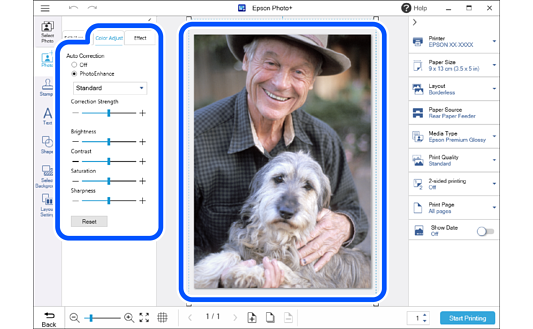
5Click the photo to adjust its brightness and so on.
Select a photo and then click the Color Adjust tab to adjust its brightness, contrast, and so on.
Select a photo and then click the Effect tab to adjust the transparency and blurriness of the photo.
See the following for more details.
6Add stamps, text, and so on.
7Make print settings, and then click Start Printing.
Click or at the top of the settings area to hide the settings area.
See the "User's Guide" supplied with the printer for details on loading paper and making print settings.


 to rearrange the photos displayed in order of the shooting date.
 .
.
 : Select all the photos in the photo list.
 : Change the order of the photos selected in the photo list.
 : Copy the photos selected in the photo list. You can place the same photo in multiple frames.
 : Deselect the photos selected in the photo list.
 or
or  at the top of the settings area to hide the settings area.