You can create disc labels and print them on discs such as CDs and DVDs.
This section explains how to create the following disc label as an example.
-
1Select the printer, and then click CD/DVD.
-
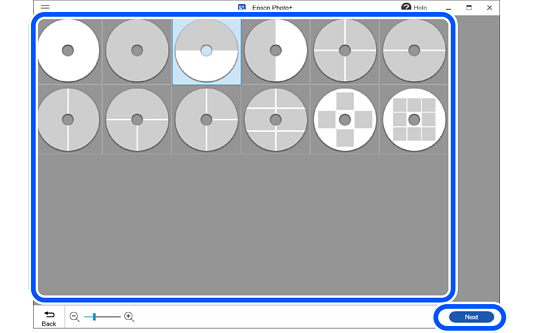
2Select a frame, and then click Next.
-
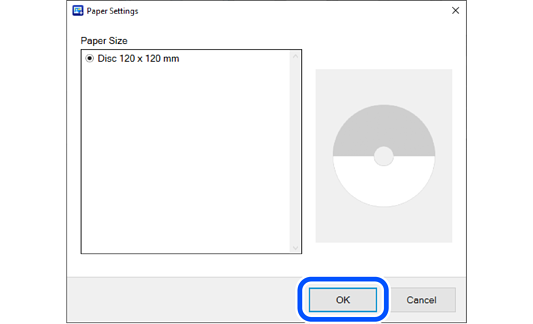
3Click OK.
-
4Select photos, and then click OK.
You can check the selected photos in the photo list on the right.
Note:
-
Click  to rearrange the photos displayed in order of the shooting date.
To return to the list view, click  .
.
-
Framed photos are arranged in the order of the photo list. Use the following buttons to edit the contents of the photo list.
 : Select all the photos in the photo list.
 : Change the order of the photos selected in the photo list.
 : Copy the photos selected in the photo list. You can place the same photo in multiple frames.
 : Deselect the photos selected in the photo list.
-
Click OK to reset the editing page to match the selected photo. If you reselect a photo after it has been edited, the page may be
deleted.
-
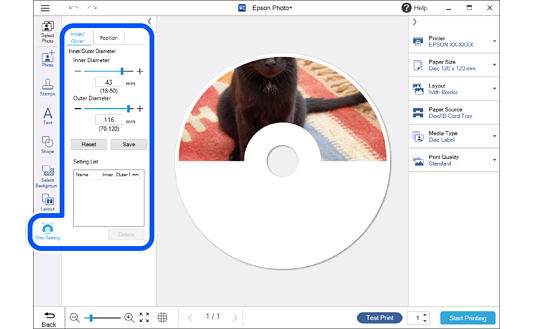
5Click Disc Setting to make print settings for the disc label.
On the Inner/Outer tab, you can set the inner and outer diameters to match the disc label you want to print.
On the Position tab, you can adjust the print position of the disc label.
-
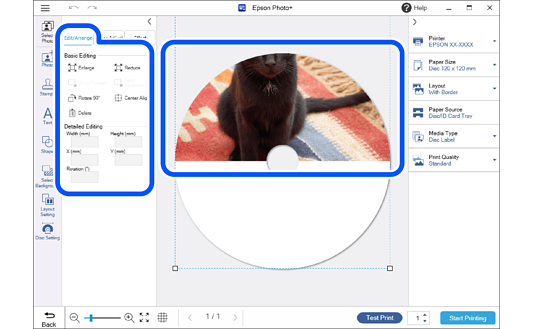
6Click the photo to adjust its position, size, and so on.
You can adjust the position by dragging the photo.
Select a photo and then click the Edit/Arrange tab to enlarge, reduce, rotate, and so on.
-
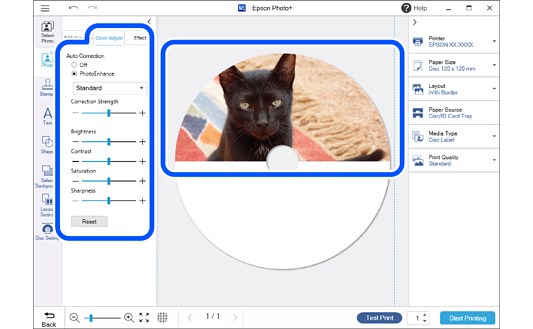
7Click the photo to adjust its brightness and so on.
Select a photo and then click the Color Adjust tab to adjust its brightness, contrast, and so on.
Select a photo and then click the Effect tab to adjust the transparency and blurriness of the photo.
See the following for more details.
Editing Photos
-
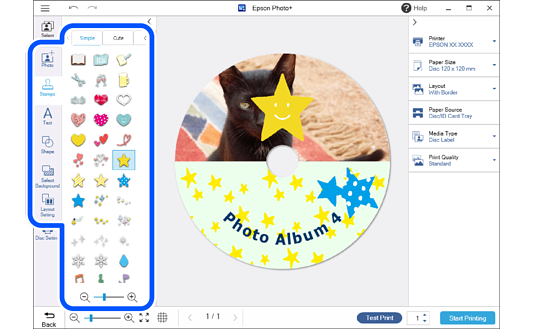
8Add stamps, text, and so on.
See the following for more details.
Arranging Photos
-
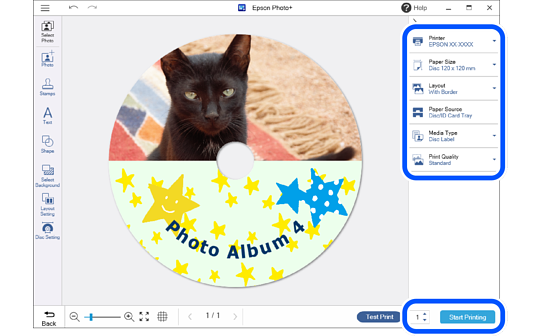
9Make print settings, and then click Start Printing.


 or
or  at the top of the settings area to hide the settings area.