Loading Paper in the Paper Cassette
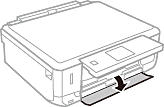
When the output tray is ejected, check that there is no paper on the tray, and then close it by pushing it with your hand.
-
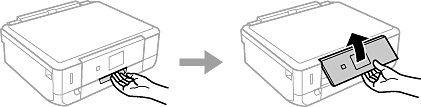
Raise the control panel.
-
Open the front cover.
-
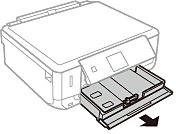
Check that the printer is not operating, and then pull out paper cassette.
-
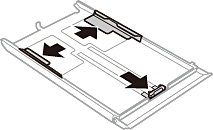
Slide the edge guides to their maximum position.
-
Slide the front edge guide to the paper size you want to use.
-
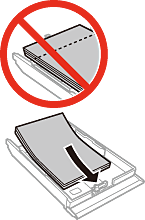
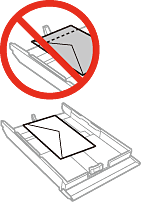
With the printable side facing down, load paper against the front edge guide.
 Important:
-
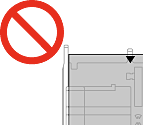
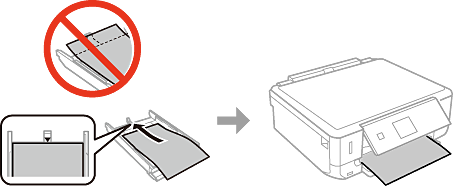
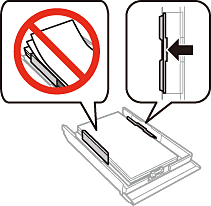
Make sure the paper does not extend beyond the triangle symbol at the end of the cassette.
-
Do not load more than the maximum number of sheets specified for the paper. For plain paper, do not load above the line indicated by the triangle symbol on the edge guide.
-
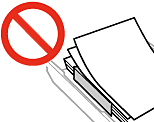
Envelopes
-
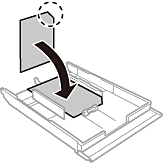
Photo Sticker sheetFollow the instructions supplied with the stickers to load one sheet of Photo Stickers. Do not load the loading support sheets into this product.
-
Paper larger than A4 size
-
-
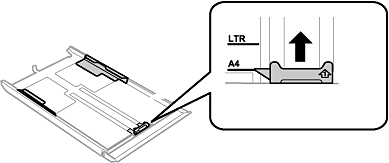
Slide the right edge guide to the edge of the paper.
-
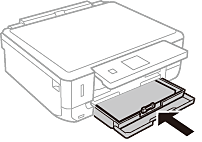
Insert paper cassette.
-
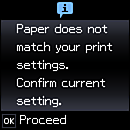
Check the paper size and paper type settings displayed on the control panel. To use the settings, select Confirm using the
 or
or  button, press the OK button, and then go to step 11. To change the settings, select Change using the or button, press the OK button, and then go to the next step.
Note:
button, press the OK button, and then go to step 11. To change the settings, select Change using the or button, press the OK button, and then go to the next step.
Note:-
When the Paper Setting Alert feature is enabled, a message is displayed if the registered paper size and paper type settings differ from the print settings.
-
The paper setting screen is not displayed if you have disabled Paper Configuration in the following menus. Go to step 11. In this situation, you cannot print from an iPhone or iPad using AirPrint.
Settings > Printer Setup > Paper Source Setting > Paper Configuration
-
-
On the paper size setting screen, select the paper size using the
 or
or  button, and then press the OK button. On the paper type setting screen, select the paper type in the same way, and then press the OK button. Check the settings, and then press the OK button.
Note:
button, and then press the OK button. On the paper type setting screen, select the paper type in the same way, and then press the OK button. Check the settings, and then press the OK button.
Note:You can also display the paper size and paper type settings screen by selecting the following menus.
Settings > Printer Setup > Paper Source Setting > Paper Setup
-
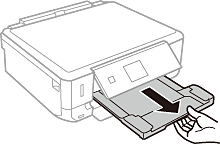
Slide out the output tray.